 Draw Anything
How to draw anything, step by step
Most people who say they “can’t draw” are trying to draw the finished picture. Here is the method real artists use instead — it works for a cat, a car or a cathedral, and you can run it right now on a free canvas.
Why “I can’t draw” is a method problem
When a beginner draws a horse, they start at the nose and try to produce a finished horse line by line. By the time they reach the back legs, the proportions have drifted and the drawing looks wrong — so they conclude they lack talent.
Experienced artists do something completely different. They never draw the subject. They draw a scaffold of simple shapes, check that the scaffold is right, and only then draw the subject on top of it. The scaffold is cheap to fix; a finished line is not.
This is a learnable procedure, not a gift. It is also the single technique that produces the biggest immediate jump in a beginner's work.
The one-sentence version
Break the subject into two or three basic shapes, get those shapes right, then draw the real outline over them and erase the scaffold.
The five-step method
- Find the big shapes Squint at your subject — actually squint, it removes detail — and ask what two or three shapes it is made of. A cat is a circle (head) on a rounded rectangle (body). A car is a long rectangle with a smaller trapezoid on top. A tree is a lumpy circle on a stick. Resist adding a fourth shape.
- Block them in lightly Switch to the pencil, keep the size small, and place those shapes on the canvas. You are not committing to anything. What matters here is relative size and position: is the head a third of the body, or a half? Is it sitting on top or overlapping? Fix it now while a line costs nothing.
- Connect the shapes into one outline Now switch to the brush and a slightly larger size. Draw the real contour over your scaffold, following it where it is right and cutting across it where the real subject curves. This is where the drawing suddenly starts looking like something.
- Erase the construction lines Take the eraser to the underlying shapes so only your committed outline is left. This step feels trivial and it is the one beginners skip — leaving the scaffold visible is what makes a drawing look unfinished.
- Add colour, then only the details that identify the subject Fill the large areas first with the marker or a big brush. Then add the few details that make the subject recognisable: whiskers on a cat, windows on a car, the texture of bark. Three good details beat thirty mediocre ones.
A worked example: drawing a cat
“How to draw a cat” is one of the most searched drawing questions in the world, so let us use it. The cat below was drawn in Draw Anything with exactly the method above.
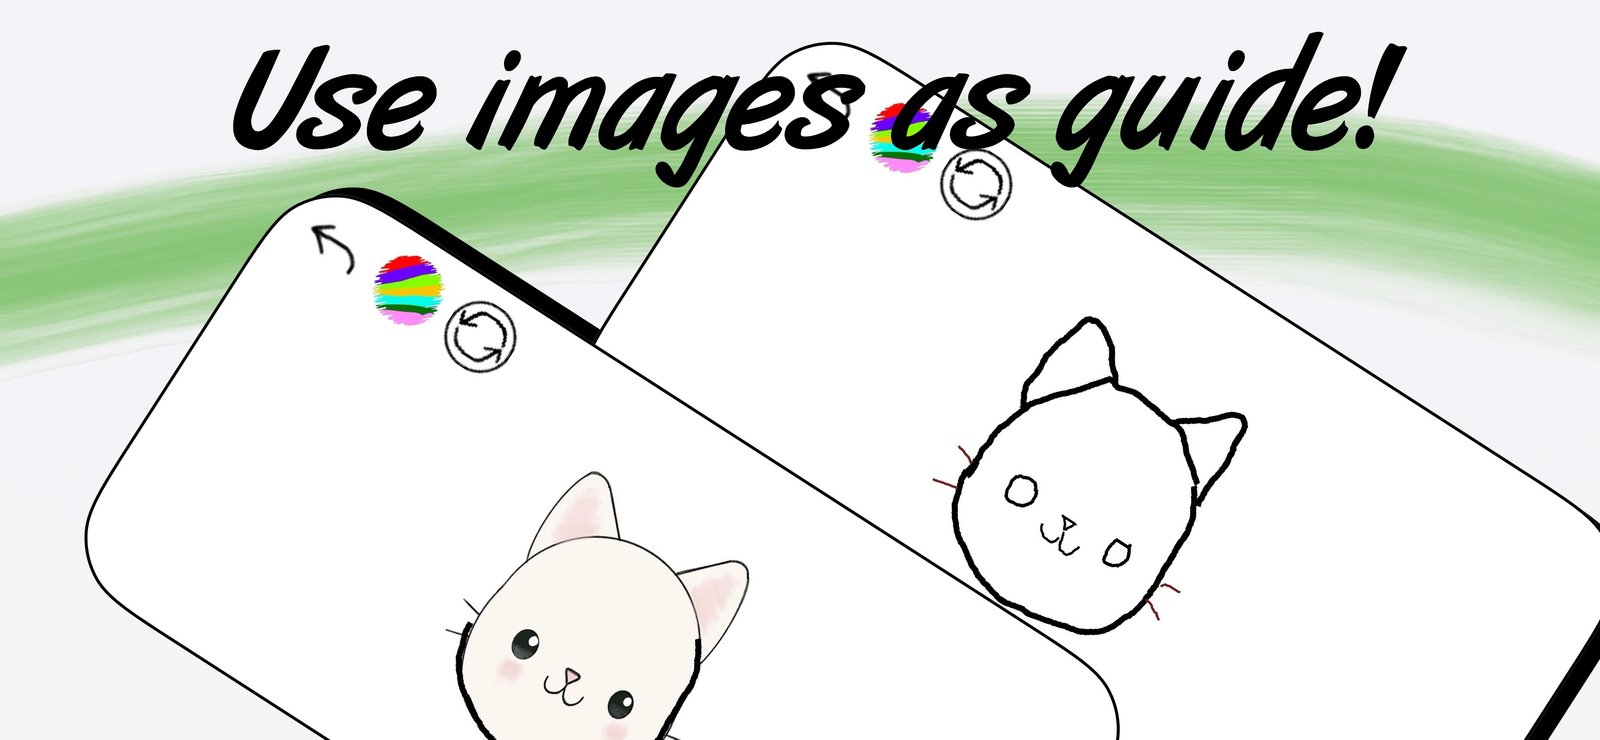
Shapes: one circle for the skull, slightly wider than tall. Two triangles on top for the ears, placed on the upper third of the circle rather than the very top — this is the detail that most often goes wrong.
Outline: trace round the circle but flatten it slightly at the chin and cheeks, because a real cat head is not a ball. Let the ear triangles merge into the skull line rather than sitting on it like hats.
Details: two oval eyes on the horizontal centreline — not near the top, which is the second most common error. A small triangle nose, a curved mouth, and three whiskers per side in a lighter colour. Stop there.
The proportion shortcut
If a drawing looks wrong but you cannot say why, it is almost always eye placement or limb length. Eyes sit on the horizontal midline of a head far more often than beginners expect. Check that first.
Running the method in Draw Anything
The method needs three things from a drawing app: a light tool for scaffolding, a confident tool for committing, and unlimited undo so that experimenting is free. Draw Anything gives you all three, and so does the free canvas in your browser.
- Scaffold with the pencil. It draws slightly translucent, so construction lines sit visually behind your final outline instead of competing with it.
- Commit with the brush. It thins out as you move faster, which gives outlines a natural, tapered weight rather than a flat, machine-drawn look.
- Clean up with the eraser. It removes strokes without touching your background colour, so you can scaffold on a coloured canvas without leaving white scars.
- Undo is unlimited. Ctrl/Cmd + Z in the browser, or the arrow in the app. A line you can delete for free is a line you will actually attempt.
If you have Draw Anything PRO, Import Images collapses steps one and two entirely: bring a reference photo onto the canvas, sketch the shapes directly over it, and you learn proportion by feel rather than by measurement. For a beginner this is the fastest way to build an instinct for shape relationships.
Four mistakes that make drawings look wrong
1. Starting with detail
Drawing an eyelash before you have a head means the eyelash is anchored to nothing. Detail is the last five per cent of a drawing and it cannot rescue bad proportion underneath.
2. Drawing tentatively
Short, hairy, repeated strokes read as uncertainty. One confident line — even a slightly wrong one — looks better than fifteen careful ones. Draw the line quickly, and if it is wrong, undo it and draw it quickly again.
3. Outlining everything in black
A uniform black outline around every element flattens a drawing. Vary it: use a darker version of the fill colour for interior lines and keep true black for the outer silhouette.
4. Never changing brush size
If every line in a drawing is the same width, the eye has nothing to prioritise. Thick lines for the silhouette, medium for major interior forms, thin for detail. Move the size slider constantly — it is the fastest quality upgrade available.
A ten-minute daily practice
Improvement comes from volume of finished attempts, not hours of one drawing. A practice that works:
- Two minutes: fill a canvas with circles, then ovals, then straight lines drawn as fast as you can. This is a warm-up for your hand, not art.
- Five minutes: pick any object in the room and run the five-step method on it. Set a timer and stop when it goes off, finished or not.
- Three minutes: redraw the same object a second time from memory. The second attempt is where the learning actually happens.
Do that daily for two weeks and the difference will be obvious when you compare the first and last drawings. Keep them — export each one as a PNG so you have the evidence.